
4 to 6 Week Clinic Led Hip Bursitis Physical Therapy Plan
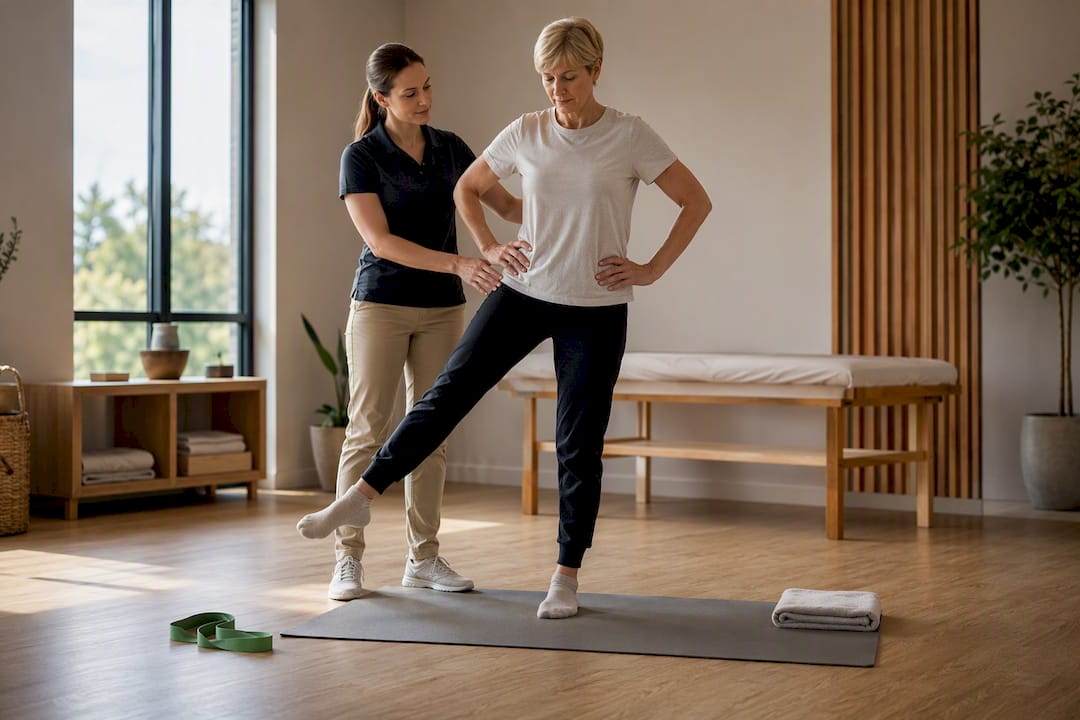
Targeted physical therapy exercises paired with graded loading are the most effective first-line treatment for lateral hip pain and hip bursitis, and many patients notice real improvement within three to six weeks. Recovery timelines vary by severity, but the path is consistent: start with gentle isometric holds, then build strength as your pain allows. If pain limits your walking, sleeping, or daily function, a physical therapist can tailor that progression for you.
TL;DR:
Most patients see noticeable improvement within three to six weeks of targeted physical therapy, but recovery speed varies with severity.
Exercises should start with gentle isometric holds and progress gradually, only increasing load when pain-free and easy to perform.
Avoid crossing legs, deep massage, or heavy resistance training early in recovery to prevent aggravating the irritated tissue.
A phased loading approach is essential, moving from pain control to strength building and then to energy-storage exercises, based on pain and function.
Early consultation with a physical therapist can shorten recovery time and help address faulty movement patterns before they become ingrained.
Table of Contents
What Physical Therapy Exercises Help Hip Bursitis?
The exercises below target the glute medius and surrounding hip abductors, the muscles that stabilize your pelvis with every step. Weakness or poor coordination in this group is a common driver of the lateral hip pain many people call “hip bursitis,” even when the deeper issue is tendon irritation rather than bursa inflammation alone. Building strength here, gradually and without compressing the irritated tissue, is the backbone of recovery.
Work through these in order of tolerance, not necessarily all in one session:
Isometric hip abduction hold. Lie on your back with a pillow between your knees, or stand with your side against a wall, and press outward without moving the leg. Hold 45 to 60 seconds, repeat 5 times, 2 to 3 times daily. This non-compressive position is a common early starting point because it loads the tendon without pinching the bursa against the bone.
Side-lying clamshell. Lie on your unaffected side, knees bent, feet together, and lift the top knee while keeping hips stacked. Start with 2 sets of 10, no band. Progress to a resistance band around the knees once you can complete the set pain-free.
Glute bridge. Lie on your back, feet flat, and lift your hips until your body forms a straight line from knees to shoulders. Begin with 2 sets of 12. Progress to single-leg bridges once double-leg reps feel easy and pain-free.
Standing hip abduction. Holding a wall or chair for balance, lift the affected leg straight out to the side without letting your torso lean. Do 2 sets of 12 per side, keeping the motion controlled.
Prone hip extension. Lying face down, lift one leg a few inches off the floor while keeping the knee straight. Do 2 sets of 10, focusing on squeezing the glute rather than arching your lower back.
Supine hip abduction with slider or towel. Lying on your back with legs straight, slide the affected leg out to the side and back on a smooth surface. This adds a gentle strength and mobility component without axial compression.
Gentle IT band and glute stretches. Hold each stretch 20 to 30 seconds, avoiding any position that pulls the leg fully across your body.
Regress any exercise if you feel sharp pain, or if soreness lasts more than a day. Progress only when a movement feels genuinely easy, not just tolerable.
Pro Tip: If lying on your side aggravates your pain, skip side-lying exercises entirely for now and stick with the supine and standing versions. There’s no rule that says you must do every exercise on this list.
How Do You Know When to Increase the Load?
Recovery from GTPS follows a phased loading model, and jumping ahead of schedule is the fastest way to set yourself back. Progressive mechanical loading, moving from isometric holds to isotonic strengthening to heavy, slow resistance and eventually energy-storage movements, gives irritated tendon and bursal tissue time to adapt.
Phase I: pain control. Isometric holds (5 reps of 45 to 60 seconds, 2 to 3 times daily) in non-compressive positions, avoiding any adduction across midline.
Phase II: isotonic and heavy-slow resistance. Once isometrics are pain-free, move to 3 to 4 sets of controlled strengthening, adding reps or load every other day rather than daily.
Phase III: energy storage and plyometrics. Reserved for athletes returning to running or jumping sports, introduced only after strength and control are established.
Progression criteria: pain under 3 out of 10 during exercise, no lasting flare beyond 24 hours, and improved single-leg standing tolerance.
Warning signs to slow down: persistent night pain, cross-training that still aggravates symptoms, or soreness that lingers into the next session.
Building a 4 to 6 Week Home Rehab Plan
A realistic home program pairs one to two physical therapy visits per week with daily practice on your own.
Warm-up (5 minutes): light walking or stationary cycling to increase blood flow without loading the hip aggressively.
Activation (5 to 8 minutes): isometric holds or clamshells, depending on your current phase.
Strength sets (10 to 15 minutes): bridges, standing abduction, and prone extension, 2 to 3 sets each.
Functional practice (5 minutes): single-leg balance or step-ups if tolerated.
Cooldown (5 minutes): gentle stretching, avoiding deep hip flexion or adduction.
If your pain is highly irritable, meaning it flares easily and lingers, reduce volume and lean on isometrics longer before adding resistance. Lower irritability allows faster progression through sets and reps. Most people need 6 to 15 total visits over that 4 to 6 week window, with reassessment if progress stalls past the third week.
Positions and Habits to Avoid During Recovery
Certain everyday habits keep the bursa and tendon under constant low-grade stress, which slows healing even when your exercise program is solid.
Avoid crossing your legs, sleeping on the affected side without a pillow between your knees, or standing with your weight shifted onto one hip.
Skip deep massage or foam rolling directly over the point of hip tenderness. It often increases irritation rather than resolving it.
Don’t jump straight into heavy resistance bands or long walks hoping to “push through” early pain.
Complete rest isn’t the answer either. Prolonged inactivity leads to further weakness and a slower return to normal function.
When to seek urgent care: Systematic reviews of trochanteric bursitis treatment confirm conservative exercise resolves most cases, but fever, spreading redness, new numbness, or rapidly progressing weakness are not typical bursitis symptoms and warrant prompt medical evaluation.
When Should You See a Physical Therapist?
Seeing a physical therapist early, rather than waiting weeks to see if pain resolves on its own, tends to correct faulty movement patterns before they become ingrained habits and often shortens the overall recovery timeline. At your first visit, expect a gait assessment, single-leg stance testing, and outcome measures like the HOOS or VISA-G questionnaires to track your progress objectively over time.

A randomized controlled trial comparing structured physiotherapy to standard care found significantly greater pain reduction and functional improvement in the physical therapy group. Bring a short symptom diary to your first appointment, noting which activities aggravate your pain and when. Confirm your insurance coverage ahead of time so scheduling doesn’t become another obstacle to starting care.
How Contemporary Rehab Services Evaluates Hip Bursitis
Contemporaryrehabservices approaches lateral hip pain by first distinguishing contractile issues (tendon and muscle) from non-contractile ones (bursa, joint capsule), and by rating irritability as high or low before building your program. That classification determines whether your first sessions emphasize load reduction and pain control or move faster into strengthening.
Programs are individualized rather than templated, drawing on the same phased progression outlined above: isometric to isotonic to heavy-slow resistance. Sessions are available both in-person and through telehealth, and manual therapy techniques, including soft tissue mobilization and joint mobilization, often complement the exercise program for patients whose hip and surrounding kinetic chain need broader attention.
Why Individualized Loading Beats a Generic Exercise Handout
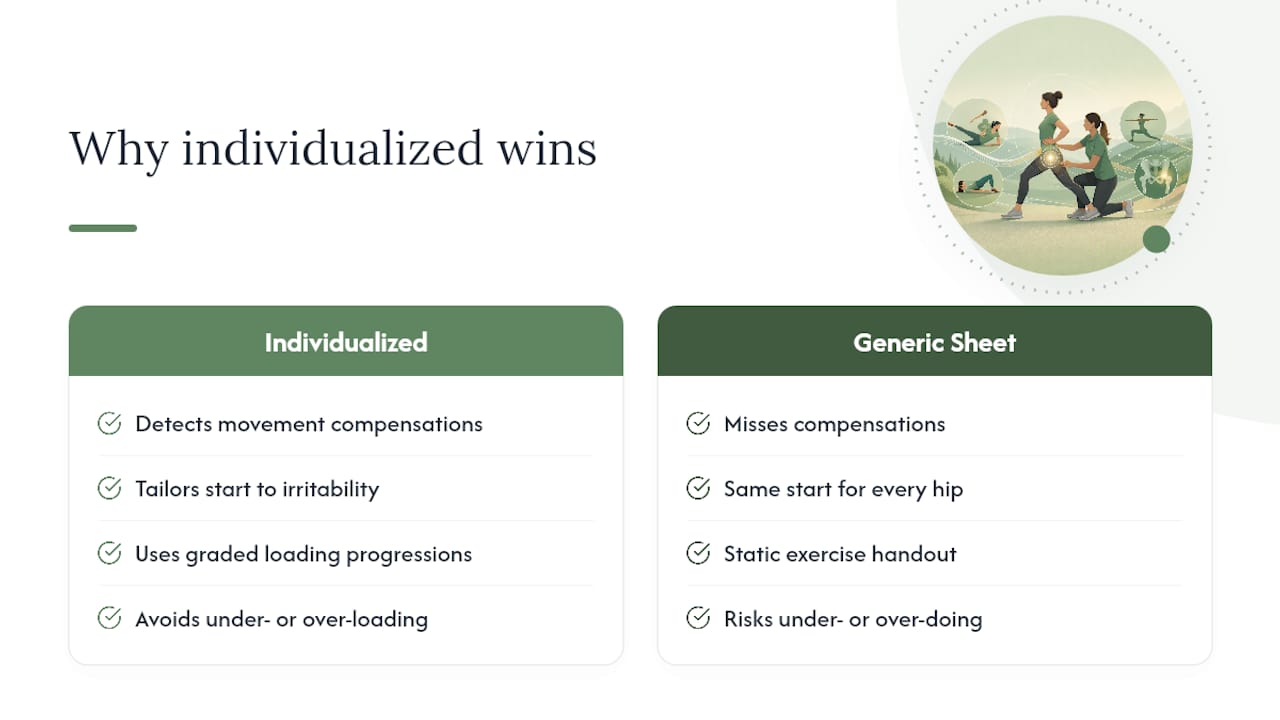
Generic bursitis exercise sheets treat every hip the same, but two people with identical diagnoses can need completely different starting points depending on irritability, gait mechanics, and how their kinetic chain compensates. A movement assessment catches the compensations a printed handout never will, whether that’s a weak core letting the pelvis drop or a stiff ankle forcing the hip to overwork.
Graded loading protects you from the two most common self-management mistakes: doing nothing out of fear, or doing too much too soon out of frustration. If you’ve tried a home program for a few weeks and pain hasn’t budged, that’s a signal to bring in a professional set of eyes rather than push harder alone.
— CRS Wellness
Ready to Start Your Recovery Plan?
If home exercises haven’t moved the needle on your hip pain, Contemporaryrehabservices offers a direct path forward: an in-person or virtual evaluation that identifies exactly where your movement pattern is breaking down, instead of another generic handout. Our clinicians build your program around the same contractile versus non-contractile and irritability framework covered above, adjusting load week to week rather than handing you a static plan.
Contemporaryrehabservices sees patients across Nassau County and Queens, with local options including our Albertson clinic, Roslyn, and Herricks locations, plus service areas in Russell Gardens and Great Neck Plaza. We accept Medicare, Aetna, Cigna, Emblem, and United Healthcare, along with direct cash payment. Visit our therapies overview to see the full range of manual therapy and rehabilitation options, and call to schedule your first evaluation.
Sources
This article is general information, not a substitute for advice from a qualified doctor. Consult a qualified healthcare professional about your own circumstances before acting on anything here.
Recommended
Comments