
Groin Strain Rehab: A Phased Recovery Plan That Works
- tjdontplay
- 10 hours ago
- 10 min read
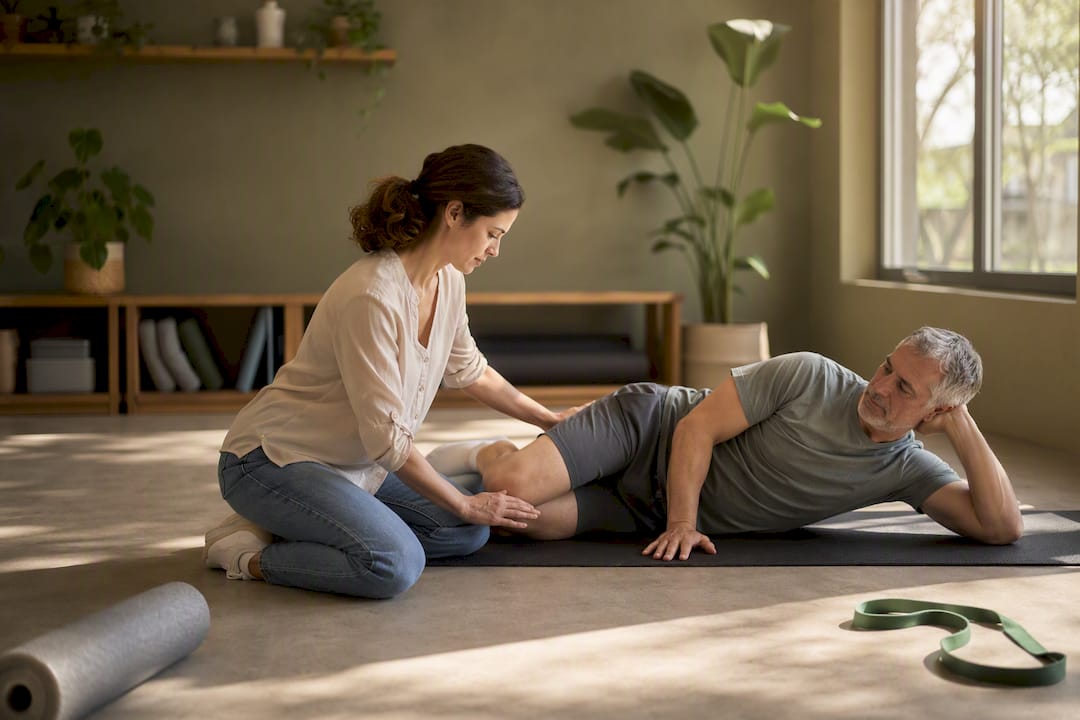
Most groin strains heal completely with a staged rehabilitation approach, and how quickly you get back to normal depends more on following the right progression than on waiting out the calendar. In the first 48 to 72 hours, that means rest, ice, and avoiding anything that produces sharp pain, while still moving gently within a pain-free range. From there, you progress through phases based on what your body can actually do, not on an arbitrary week number.
Here’s what that looks like in practice:
Use RICE (rest, ice, compression, elevation) immediately and skip movements that trigger sharp pain.
Begin gentle range-of-motion work and isometric holds as soon as they feel tolerable.
Advance through rehab phases only when you meet specific criteria, not a fixed timeline.
Recovery timelines vary widely by severity. A mild Grade 1 strain often resolves in 2 to 3 weeks, while more significant tears take considerably longer. If you can’t bear weight on the affected leg, or if pain worsens instead of easing over the first few days, that’s your signal to get evaluated in person rather than push through on your own.
Key Takeaways
Groin strain recovery works best when progression through each rehab phase is tied to objective strength and functional benchmarks rather than a fixed number of weeks.
Point | Details |
Act fast, but gently | Use RICE in the first 48 to 72 hours and avoid any movement that causes sharp pain. |
Follow phase exit criteria | Progress only when you hit benchmarks like pain-free gait, full range of motion, and strength symmetry. |
Match exercises to your stage | Isometrics and gentle activation come first; eccentric loading and sprinting come only in late-stage rehab. |
Expect a range, not a date | Grade 1 strains often heal in 2 to 3 weeks, Grade 2 in 2 to 3 months, and Grade 3 in 4 months or more. |
Get assessed for supervised progression | Contemporaryrehabservices builds phase-based programs with objective strength testing and accepts most major insurance plans. |
Table of Contents
What Causes a Groin Strain?
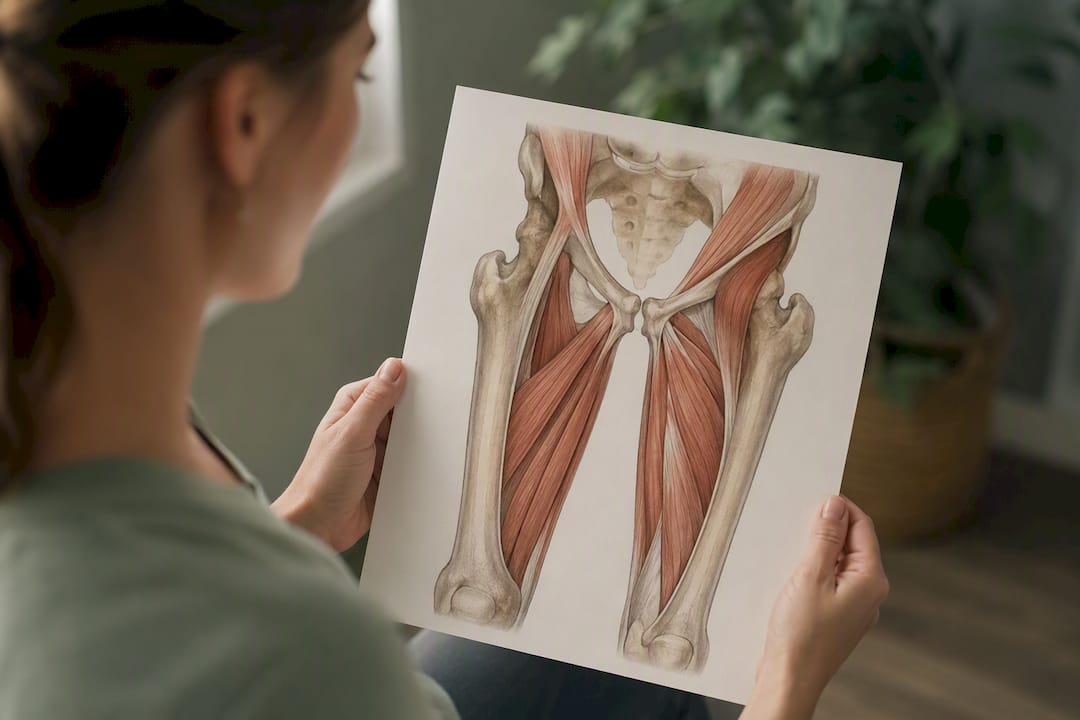
A groin strain almost always involves the adductor muscle group, the band of muscles running along your inner thigh that pulls your leg toward the midline of your body. The main players are the adductor longus, adductor brevis, and adductor magnus, all of which attach near the pubic bone at a dense connective tissue structure called the pubic aponeurosis. The iliopsoas, a hip flexor running from your lower spine to your femur, often gets strained alongside the adductors since the two muscle groups work together during hip movement.
Most strains happen during activities that demand a rapid change of direction or an unexpected stretch under load. Think of a soccer player planting to cut sharply, a hockey player pushing off at an angle, or someone slipping and forcing their leg into abduction (out to the side) faster than the muscle can control. Kicking sports are especially notorious, since the follow-through phase puts the adductors through a long eccentric stretch right after they’ve contracted hard to accelerate the leg.
A few patterns show up again and again in people who strain their groin, and again in people who re-strain it:
Weak hip adductors relative to the abductors on the outside of the hip, which throws off the balance needed to stabilize the pelvis during single-leg movements.
Poor core control, which forces the adductors to compensate for instability that should be handled by the deep abdominal and pelvic floor muscles.
Inadequate warm-up before high-speed directional work, leaving the muscle-tendon unit stiff and less able to absorb sudden load.
Correcting that strength imbalance isn’t just about healing faster. Athletes who build adductor strength relative to their abductors as part of a structured program see fewer repeat injuries, which is a big part of why rehab shouldn’t stop the moment pain disappears.
What Should You Do in the First 48 to 72 Hours?
The acute phase is about limiting damage and controlling swelling, not testing how much movement you can tolerate. What you do here sets the tone for how smoothly the rest of your rehab for groin strain goes.
Ice strategically. Apply ice for 10 to 15 minutes every hour on day one, then shift to every 3 to 4 hours for the next couple of days.
Compress and elevate where practical. A groin injury is harder to elevate than an ankle, but resting in a position that takes pressure off the hip, with light compression from a wrap or compression shorts, helps manage swelling.
Avoid sharp pain, not all movement. Gentle walking and pain-free hip motion are fine and often helpful. What you want to avoid is any motion that reproduces a sharp, localized pain in the groin.
Be careful with medication. Short-term over-the-counter pain relief is reasonable, but avoid extended NSAID use beyond about 10 days without a clinician’s input, since masking pain for too long can lead you to reinjure tissue that hasn’t actually healed.
Pro Tip: Total rest for more than a couple of days often backfires. Gentle, pain-free movement keeps blood flow to the injured area and prevents the kind of stiffness that makes the early rehab phase drag on longer than it needs to.
How Does Phased Rehab Progression Work?
The single biggest mistake in adductor strain rehab is treating recovery like a countdown clock instead of a checklist. A criteria-based, phase-by-phase approach means you move to the next stage when your body demonstrates it’s ready, not because two weeks have passed. This is the model used in published rehabilitation protocols, and it’s the same logic Contemporaryrehabservices applies when supervising a patient’s return to activity.
Phase 1: Protect and calm the tissue
The goal here is straightforward: control pain and swelling while preventing the muscle from stiffening into a shortened, guarded position. Activities include gentle pain-free range-of-motion drills, isometric adductor squeezes (holding a ball or pillow between your knees and squeezing without movement), and low-impact conditioning like stationary cycling once tolerated. Cross-training on a bike or rowing machine is a useful way to maintain cardiovascular fitness without loading the injured tissue directly.
You exit Phase 1 when:
Walking is pain-free at a normal pace.
A gentle isometric adductor contraction no longer reproduces sharp pain.
Swelling and bruising have visibly settled.
Phase 2: Restore range and activation
Once the acute reaction has calmed down, the focus shifts to regaining full hip range of motion and waking up the muscles that stabilize the pelvis. This phase introduces active-assisted stretching, glute and core activation drills, and progressively loaded isometrics (holding a contraction for longer, or at greater intensity, than in Phase 1).
Exit criteria for Phase 2 typically include full, pain-free hip range of motion compared to the uninjured side, and the ability to perform a moderate-intensity isometric hold without pain. Clinicians often check for at least a rough strength match between sides here, since a lingering deficit is the clearest sign the tissue isn’t ready for heavier loading.
Phase 3: Load and build control
This is where real strengthening happens. Resisted adduction exercises, banded lateral work for the hip abductors, and early Copenhagen plank variations (a side-plank style hold that specifically challenges the adductors) all belong in this stage. The goal is building strength through a full range under control, not just tolerating isolated contractions.
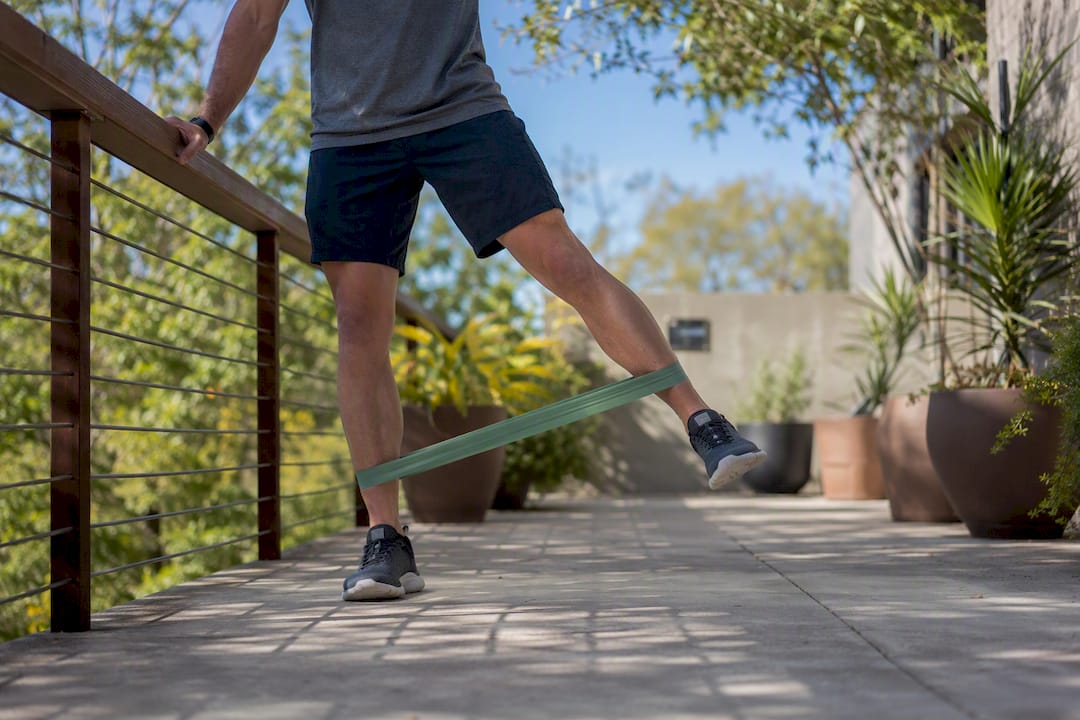
Progression out of Phase 3 generally requires approaching 90% strength symmetry between the injured and uninjured sides on manual or dynamometer testing, along with the ability to perform single-leg movements like a step-down or lateral lunge without pain or compensation.
Phase 4: Return to sport-specific movement
The final phase reintroduces the explosive, multidirectional demands of sport: eccentric adductor loading, loaded single-leg hip hinges, cutting drills, and plyometric work like bounds or lateral hops as outlined in this complete athlete’s guide to sports-related groin injuries. This is where an athlete finds out whether the muscle can actually handle game speed, not just gym-speed loading.
Clearance for full return typically requires:
Pain-free completion of sport-specific drills at full speed.
Strength symmetry at or above roughly 90% between limbs.
No swelling, soreness, or stiffness that lingers more than 24 hours after a hard session.
If any of these markers regress at any phase, that’s a signal to hold at the current stage rather than push forward, and it’s exactly the kind of decision a physical therapist is trained to make in real time rather than by guesswork.
Which Exercises Actually Help a Groin Strain Heal?
Structured, staged exercise progressions are what separate rehabilitation for groin strain from just “resting and hoping.” Published multi-phase programs, including the detailed adductor rehab guide from Sports Injury Clinic, lay out specific exercises tied to each recovery stage.
Early stage: Isometric adductor squeezes (a ball between the knees, held 10 to 20 seconds), gentle hip circles and swings within a pain-free range, glute bridges to activate the posterior chain, and short walks at a comfortable cadence.
Mid stage: Seated resisted adduction with a band or cable, standing banded adduction and abduction in multiple directions, hip abductor strengthening (side-lying leg raises, monster walks), and Copenhagen plank progressions starting with the knee bent for less load.
Late stage: Eccentric adductor exercises like the slider or “sliding lunge,” loaded single-leg deadlifts, and sport-specific cutting, sprinting, and jump drills that mimic the actual demands of your activity.
A reasonable two-week sample progression: start week one with isometric holds three times daily and two short walks, then in week two add banded adduction for two to three sets of 12 to 15 reps every other day, alongside continued daily walking and one low-impact cardio session. Increase load in small increments, roughly 10% at a time, and only when the previous load produced no next-day soreness.
Pro Tip: If a Copenhagen plank variation causes pain rather than a deep muscle burn, you’re not ready for it yet. Regress to a shorter lever (bent knee, supported top leg) before adding difficulty.
How Long Does It Take to Heal, and When Can You Return to Sport?
Timelines depend heavily on strain severity. A Grade 1 strain typically heals in 2 to 3 weeks, a Grade 2 strain in 2 to 3 months, and a severe Grade 3 tear can take 4 months or longer to fully recover.
Those ranges are wide because return-to-sport readiness isn’t really about weeks on a calendar. Clinicians look for objective benchmarks: strength symmetry of roughly 90% or better between the injured and healthy side, the ability to run, cut, and kick without reproducing pain, and no swelling or soreness that persists more than a day after training. Two people with identical Grade 2 strains can return at very different points depending on how consistently they follow their rehab program, how much muscle imbalance they started with, and whether they had access to guided staged rehabilitation along the way rather than winging it.
When Should You See a Provider for a Groin Strain?
Most groin strains respond well to structured rehab without ever needing imaging or surgery, but certain signs mean you should stop self-managing and get assessed in person.
You cannot bear weight on the affected leg or walk without significant pain.
Bruising is expanding rapidly, or you notice a palpable gap or defect in the muscle.
Weakness or numbness persists rather than improving day to day.
Imaging like an MRI or ultrasound, and occasionally surgical referral, become relevant mainly for suspected avulsion injuries (where the tendon tears away from bone) or when conservative rehab has genuinely failed to improve function after a reasonable trial. A physical therapist’s initial assessment typically includes strength testing, palpation to localize the injury, and functional movement screening, all of which shape a conservative treatment plan built around progressive loading rather than a one-size-fits-all handout. If you’re unsure whether your symptoms warrant a visit, this guide to recognizing when you need physical therapy is a useful gut check.
How Contemporaryrehabservices Approaches Groin Strain Recovery
Contemporaryrehabservices is a boutique physical therapy clinic in Albertson, NY, serving Queens and Nassau County, and accepts Medicare, Aetna, Cigna, Emblem, and United Healthcare. Groin strain patients move through supervised, phase-based programs with progression tied to objective strength and functional testing rather than a preset calendar. This article was prepared with editorial input from Tj. When a case needs outside coordination, the clinic communicates directly with referring physicians to keep everyone aligned on the plan.
What Does the Research Actually Support?
The evidence behind groin strain rehab is less about finding a secret exercise and more about respecting a sequence. What gets underestimated is how much recurrence traces back to skipping the strength-symmetry check before returning to sport. People feel better, stop noticing pain during daily activity, and assume that means the muscle is fully loaded and ready. It usually isn’t.
Conventional advice leans hard on rest and stretching, and both matter early on, but neither one rebuilds the strength imbalance between adductors and abductors that likely caused the strain in the first place. The strength-balance piece gets treated as an afterthought when it should be a primary target from the mid-rehab phase onward.
If you take one thing from this guide, prioritize the exit criteria over the timeline. A Grade 2 strain that hits its strength and functional benchmarks at week eight is genuinely more ready than one still guessing at week ten. Calendar time is a rough guide. Objective testing is the actual answer.
Ready for a Guided Recovery Plan?
Reading about phased rehab is useful, but a strength-symmetry test or a Copenhagen plank progression is much easier to get right with someone checking your form and tracking your numbers session to session. Contemporaryrehabservices offers both in-person and virtual physical therapy for groin and adductor strains, with an initial screening that includes strength testing, movement assessment, and a phase-based plan built around your specific grade of injury.
The clinic accepts Medicare, Aetna, Cigna, Emblem, and United Healthcare, along with direct cash payment, so cost shouldn’t be the reason you put off getting assessed. If you’re in the area, you can book a screening at the Flower Hill location or the Roslyn Heights office and start a supervised program that moves you forward based on what your body can actually do, not how many weeks have passed on a calendar.
Frequently Asked Questions
How long does groin strain rehab usually take? It depends on severity. Mild strains often resolve in a few weeks, while more significant tears can take several months of structured rehabilitation before a full return to sport.
Can you do groin strain exercises too soon? Yes. Loading the adductors before they’ve met early-phase criteria, like pain-free walking and pain-free isometric holds, tends to delay healing rather than speed it up.
Is stretching for groin strain helpful in the early days? Gentle, pain-free range-of-motion work is fine early on, but aggressive stretching before the tissue has calmed down can aggravate the injury. Save deeper stretching for later phases.
What’s the difference between a groin strain and a hernia? A groin strain involves the adductor muscles and typically hurts more with resisted movement, while a hernia often causes a visible bulge and different pain patterns. When in doubt, get evaluated.
Do I need physical therapy for a mild groin strain? Not always, but professional guidance helps you avoid the two most common mistakes: resting too long or returning to sport before your strength has actually caught up.
This article is general information, not a substitute for advice from a qualified doctor. Consult a qualified healthcare professional about your own circumstances before acting on anything here.
Sources
Recommended
Comments