
End Piriformis Pain with Physical Therapy Focused on Hip Strength
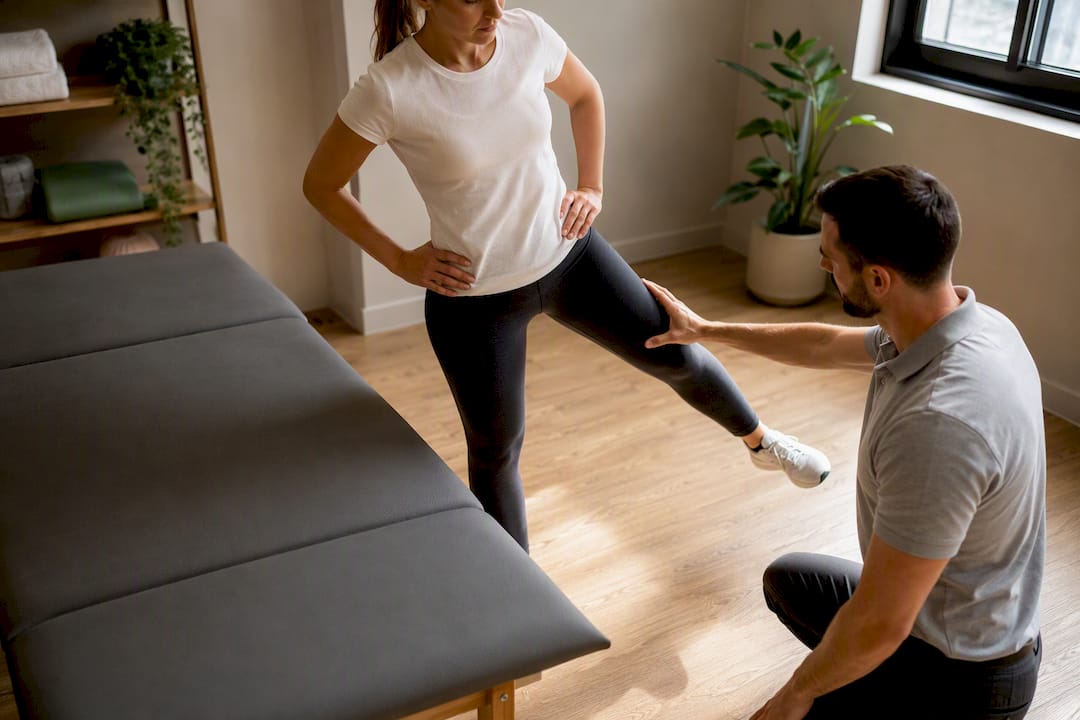
Physical therapy is the recommended first-line treatment for piriformis syndrome. It eases pain within days through stretching and manual therapy, but lasting relief comes from hip strengthening and movement re-education. If your symptoms have persisted beyond a few weeks or are limiting how you sit, walk, or sleep, start gentle mobility work now and schedule an evaluation with a physical therapist.
TL;DR:
Starting gentle mobility work early is crucial if symptoms persist beyond a few weeks or interfere with daily activities, with in-clinic evaluation recommended for ongoing issues.
Strengthening of hip abductors and extensors combined with movement re-education is more effective than stretching alone for lasting relief and recovery.
Proper nerve glides should be performed gradually, with signs of sharp pain or numbness indicating you should stop to avoid aggravating the sciatic nerve.
Manual therapy and neural mobilization are short-term solutions that require pairing with strengthening exercises for durable improvement.
Recovery time varies, but typical initial improvement occurs within four to eight weeks, and persistent or worsening symptoms warrant professional assessment immediately.
Table of Contents
What Is Piriformis Syndrome, and How Do You Know You Have It?
Piriformis syndrome happens when the piriformis, a small muscle deep in your buttock that rotates your hip outward, irritates or compresses the sciatic nerve running just beneath (and sometimes through) it. The result feels a lot like sciatica: deep buttock pain that can travel down the back of the thigh, sometimes with tingling or numbness below the knee.
You’ll typically notice symptoms flare with sitting on hard surfaces, climbing stairs, running, or crossing your legs. Pain that eases when you stand and stretch, then returns after 20 to 30 minutes seated, is a classic pattern.
Here’s where it gets tricky: piriformis syndrome mimics lumbar radiculopathy, the sciatica caused by a pinched nerve at the spine, and no single physical exam test reliably tells the two apart. Physical therapists rely on a full pattern, including your history, movement testing, and where exactly the pain concentrates, rather than one provocative maneuver, according to StatPearls’ clinical review. If you’re unsure which one you’re dealing with, our guide on sciatica causes and treatment breaks down the distinguishing features in more depth.
Common symptoms and triggers include:
Deep, aching buttock pain that may radiate down the back of the thigh
Pain worsened by prolonged sitting, especially on hard chairs or car seats
Discomfort climbing stairs, squatting, or during hip rotation movements
Tenderness directly over the piriformis muscle when pressed
Tingling or numbness extending below the knee in some cases
Watch for red flags that require urgent evaluation rather than home stretching. A simple way to remember them: B.O.W.E.L. — Bowel or bladder changes, Obvious progressive weakness, Widespread numbness, Extreme unrelenting pain, Loss of leg function. Any of those warrants same-day medical attention, not a foam roller.
Should You Keep Exercising, or Rest It?
Keep moving. Complete rest beyond 48 hours tends to make piriformis syndrome worse, not better, according to StatPearls’ review, which recommends early mobilization and graded activity over bed rest. Prolonged inactivity stiffens the hip, deconditions the gluteal muscles that should be sharing the load, and often prolongs your recovery timeline.
The key distinction is between acceptable soreness and harmful pain. A dull ache that fades within a few hours of activity is normal adaptation. Sharp, shooting pain down the leg, or numbness that intensifies during or after exercise, means you’ve pushed too far.
Practical activity looks like: short walks broken into 10 to 15 minute intervals, using stairs at a normal pace rather than avoiding them, and brief bodyweight strength work like glute bridges within a comfortable range.
A simple session structure works well for most people:
Warm-up: 5 minutes of walking or marching in place
Targeted mobility: gentle stretches held well short of sharp pain
Strength: light activation exercises (covered below)
Cool-down: slow walking and easy breathing to settle the nervous system
Pro Tip: Track your pain on a simple 0 to 10 scale before and after each session. If it climbs more than two points and stays elevated the next morning, dial back intensity, not frequency.
Piriformis Syndrome Stretches and Nerve Glides You Can Start Today
The right stretches calm an irritated piriformis and desensitize the sciatic nerve. None of them should ever produce sharp, shooting pain. If they do, you’ve gone too deep into the range or the movement isn’t right for your presentation.
1. Figure-Four Stretch (Supine)
Lie on your back, cross the affected ankle over the opposite knee, and gently pull the uncrossed thigh toward your chest. Hold 20 to 30 seconds, repeat 3 times per side, once or twice daily. You should feel a stretch deep in the buttock, never a nerve-type zing down the leg.

2. Seated Figure-Four Stretch
Sitting in a chair, cross your ankle over the opposite knee and lean your torso forward with a straight back. This variation works well for office workers who need a discreet option during the day. Hold 20 to 30 seconds, 2 to 3 repetitions.
3. Knee-to-Opposite-Shoulder Stretch
Lying on your back, pull the knee of the affected leg gently across your body toward the opposite shoulder. This targets the piriformis from a slightly different angle and often reaches spots the figure-four stretch misses. Hold 20 to 30 seconds, 2 to 3 times per side.
4. Seated Sciatic Nerve Glide
Sit tall, extend the affected leg, and slowly flex your ankle up and down while gently tilting your head forward and back in the opposite rhythm. This “glides” the nerve through surrounding tissue rather than stretching it directly, which matters because a truly irritated nerve responds poorly to sustained tension. Perform 10 to 15 slow repetitions, 2 to 3 sets, once daily.

5. Supine Sciatic Nerve Glide (Slump Progression)
Lying down with the knee bent toward your chest, slowly straighten the knee while flexing the ankle, then bend the knee back as you point the toes. This progresses the seated glide once you’re symptom-free in easier positions. Move slowly and stop well before any tingling starts.
Progression follows a clear logic: start with the supine figure-four stretch because it’s the most controlled and least likely to provoke symptoms. Once that’s comfortable for several days, add the seated version for convenience, then layer in nerve glides. Move nerve glides toward greater range only when the prior stage stays symptom-free for three to four consecutive days.
A short daily routine might look like: figure-four stretch morning and evening, seated nerve glide once at midday, and the knee-to-shoulder stretch after any prolonged sitting. As symptoms settle over one to two weeks, shift your emphasis from stretching toward the strengthening work in the next section. Stretching alone rarely produces durable results. Physiotherapy reviews consistently list stretching alongside neural mobilization, strengthening, and movement re-education as the components that work together, not stretching in isolation.
Pro Tip: Do nerve glides in small, frequent doses (a minute or two, several times a day) rather than one long session. Nerves respond better to gentle, repeated movement than to a single deep stretch.
Stop any stretch or glide immediately if you notice sharp, shooting pain, a burning sensation traveling below the knee, or numbness that gets worse rather than better. Those signs suggest the nerve is more irritated than the stretch can handle right now, and pushing through will set you back.
Why Hip Strengthening Is the Real Fix
Stretching buys you comfort. Strengthening buys you a fix. A JOSPT case report documented clinically relevant improvement in a patient with piriformis syndrome using a program built entirely around hip abductor and extensor strengthening plus movement re-education, without any stretching or soft-tissue work at all. That’s a telling detail: the muscle groups surrounding the hip, not the piriformis itself, were the actual target.
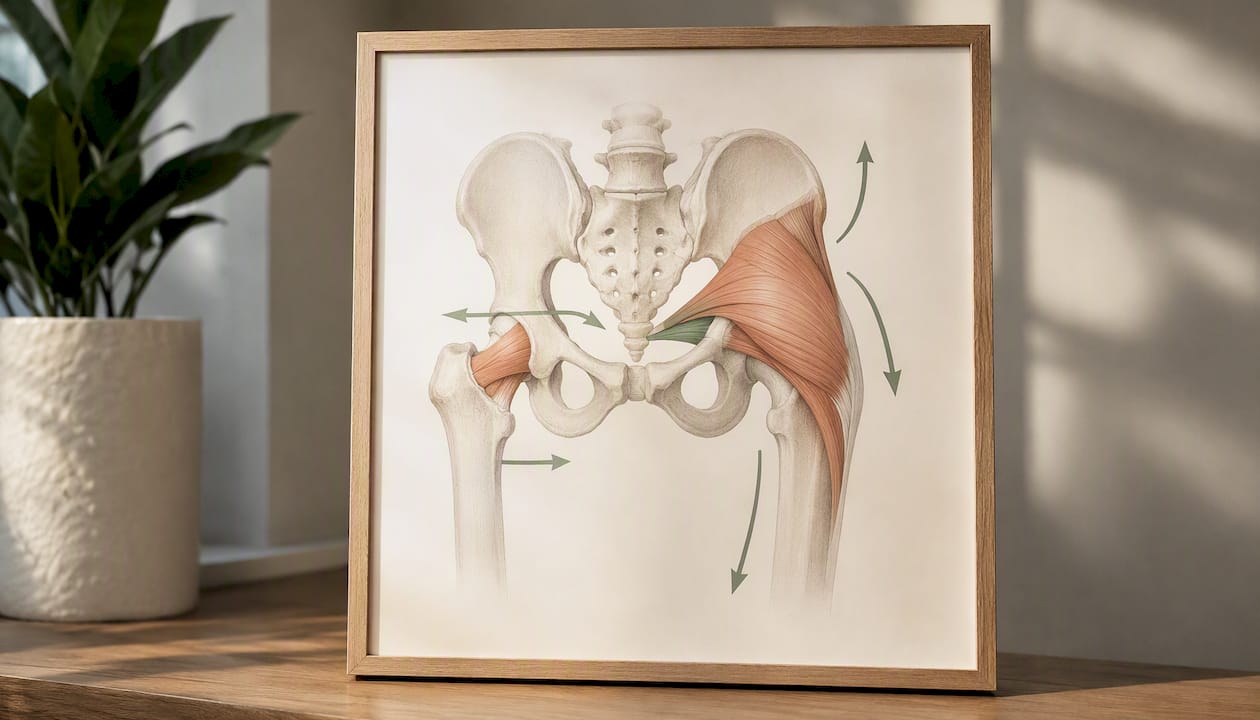
A randomized clinical trial backs this up directly, finding that patients who added hip abductor and extensor strengthening to neural mobilization and stretching gained significantly more hip strength and functional status than those who did stretching and nerve mobilization alone. Weak glutes force the piriformis to compensate during hip rotation and stabilization, which is exactly the overload pattern that keeps symptoms coming back.
A pragmatic three-phase progression keeps you from re-irritating the nerve while you rebuild control.
Phase 1: Recruitment (weeks 1 to 2). Non-weight-bearing activation work: clamshells, side-lying hip abduction, and glute bridges. Low load, high frequency, 2 sets of 12 to 15 repetitions, most days of the week. The goal here is simply teaching the glutes to fire on command.
Phase 2: Control (weeks 2 to 5). Closed-chain, weight-bearing exercises: standing hip abduction against light resistance, single-leg mini squats, and step-ups with attention to keeping the knee tracking over the toes. This is where strength starts translating into stability during daily movement.
Phase 3: Function (weeks 4 onward). Dynamic, activity-specific drills: lateral lunges, single-leg balance with reaching tasks, and gradual return to running or sport-specific movement. You’re ready for this phase when Phase 2 exercises feel controlled and pain-free for several consecutive sessions.
Movement re-education runs alongside all three phases. This means retraining the habits that load the piriformis in the first place.
Cue hip abduction during walking and stair climbing instead of letting the knee drift inward
Reduce excessive hip internal rotation when sitting or standing from a chair
Use a mirror or phone video to check for hip drop during single-leg stance
Practice a hip hinge pattern for bending instead of rounding through the lower back
Return-to-activity markers matter more than a calendar date. You’re ready to resume full activity when you can complete single-leg strength tasks without pain, walk and climb stairs without compensating, and tolerate your prior activity level for several days without a symptom flare.
What Do Nerve Glides and Manual Therapy Actually Do?
Manual therapy and neural mobilization work by reducing muscle guarding and improving how the sciatic nerve slides through surrounding tissue, not by “releasing” the muscle in any permanent structural sense. Nerve flossing (the same gliding motion described in the stretching section) is often paired with hands-on work in a clinic setting.
Myofascial release and trigger-point pressure applied directly to the piriformis can reduce local muscle tension and provide meaningful short-term symptom relief. Physiotherapy reviews consistently describe myofascial release and neural mobilization as effective components of a broader treatment plan, but rarely as standalone solutions.
That’s the key nuance: manual therapy tends to buy you a window of reduced pain and improved range of motion. What you do inside that window determines whether the relief lasts. Pairing hands-on treatment with the strengthening work above is what converts short-term comfort into durable change.
Practical guidance for these techniques:
A licensed physical therapist should perform deep myofascial or trigger-point work, since pressure applied incorrectly near the sciatic nerve can aggravate symptoms
Sessions are typically once or twice weekly during the active treatment phase, tapering as strength improves
Expect mild soreness for 24 to 48 hours after deep tissue work, similar to post-exercise soreness
Gentle walking after a manual therapy session helps maintain the mobility gained during treatment
Do Dry Needling and Injections Have a Role?
Dry needling can help when exercise alone isn’t tolerated well, but it isn’t clearly superior to exercise on its own. A 2023 controlled trial in Cureus compared ultrasound-guided dry needling to a structured exercise program in 44 patients with piriformis syndrome. Both groups improved significantly in pain and disability at one and three months, and there was no significant difference between the two approaches.
That finding matters practically: if pain is too severe to tolerate active exercise early on, dry needling offers a reasonable bridge treatment rather than a replacement for the strengthening work that produces lasting results.
Dry needling sessions in the trial were performed once weekly for a few weeks, targeting trigger points within the piriformis
Steroid or local anesthetic injections may reduce inflammation around the sciatic nerve in persistent cases, offering temporary relief while strengthening progresses
Botulinum toxin injections are reserved for cases that haven’t responded to conservative care over several months, and effects are temporary, typically lasting a few months
Surgical or endoscopic release is uncommon and considered only after exhausting extended conservative treatment, since most cases resolve without it
How Long Does Recovery Take, and When Should You See a PT?
Recovery timelines vary, but a general pattern holds across clinical experience: mild cases often improve within two to four weeks, moderate cases commonly take four to eight weeks of consistent physical therapy, and chronic or long-delayed cases can take several months. Factors that predict a longer recovery include delayed treatment start, coexisting lumbar spine issues, and inconsistent adherence to a home program.
Certain signs mean you should skip the wait-and-see approach entirely:
Progressive weakness in the leg or foot rather than just pain
New bowel or bladder changes, which require immediate medical evaluation
Numbness spreading beyond the original area or worsening over days
No improvement at all after two to three weeks of consistent, well-executed home exercise
A first physical therapy evaluation typically includes a movement assessment (how you walk, squat, and rotate your hip), manual muscle testing to check for hip weakness patterns, and screening questions to rule out a lumbar spine cause. From there, most patients attend sessions one to two times weekly for four to six weeks, with a home program filling the gaps between visits. Our overview of what to expect from physical therapy walks through the evaluation process in more detail, and if you’re still deciding whether your symptoms warrant a visit, these common signs are worth checking against your own experience.
How CRS Wellness Approaches Piriformis Assessment and Treatment
Our assessment process starts with ruling out the lumbar spine as the true source of symptoms, since treating a piriformis problem when the actual driver is a lumbar disc issue wastes valuable recovery time. That means a combination of movement analysis, hip and core strength testing, and targeted questions about symptom behavior throughout the day.
In persistent cases, we also screen the pelvic floor and sacroiliac joint, since dysfunction in either region can quietly perpetuate piriformis overload even after local treatment seems to be working. If that screening flags an issue, our pelvic therapy program covers what that additional assessment and treatment involves.
A typical in-clinic plan combines the manual therapy and phased strengthening described above, with home exercise dosage adjusted weekly based on how symptoms respond. Patients who’ve gone through hip-focused strengthening for other conditions, like our hip bursitis rehab plan, will recognize a similar progression logic applied here.
Insurance accepted includes Medicare, Aetna, Cigna, Emblem, and United Healthcare, along with direct cash payment
Sessions are available in-person and virtually, depending on your mobility and preference
Locations serve Nassau County and Queens, including Albertson, Roslyn Heights, Williston Park, and surrounding communities
A Clinical Perspective on What Actually Helps Patients Stick With It
The patients who recover fastest from piriformis syndrome aren’t necessarily the ones with the mildest symptoms. They’re the ones who stop treating stretching as the whole treatment. A common pattern we see: someone stretches diligently for weeks, feels 30 percent better, plateaus, and assumes the condition is simply chronic. In most of those cases, strengthening was never added, so the underlying weakness that caused the overload never got addressed.
What moves the needle is boring consistency. Doing the Phase 1 activation exercises on a fixed schedule (say, right after brushing your teeth) beats doing an ambitious routine sporadically. A basic log, even three lines a day noting pain level and what you did, catches plateaus early enough to adjust.
Home exercise alone can work for mild cases, but combining it with in-clinic manual therapy accelerates the timeline for anyone who’s been dealing with symptoms for more than a few weeks. The two aren’t competing approaches. They’re the same plan executed from two directions.
— CRS Wellness
Get Hands-On Help for Piriformis Symptoms That Won’t Quit
A licensed physical therapist can test your hip strength, rule out lumbar involvement, and adjust your program week to week based on how your body actually responds. That individualized adjustment is what turns a stalled recovery into a finished one.
Our treatment offerings include manual therapy, movement re-education, phased strengthening, and dry needling for patients who need it as a bridge while building tolerance for active exercise. We accept Medicare, Aetna, Cigna, Emblem, and United Healthcare, plus direct payment for those without coverage.
If you’re near Albertson, book your first evaluation through our Albertson location page. Patients closer to Great Neck Plaza can find scheduling details on our Great Neck Plaza page instead. Bring a list of when your symptoms flare, what you’ve already tried, and any imaging reports you have. That first-visit information helps your therapist build a strengthening and movement plan around your specific pattern from day one.
Sources
The clinical reasoning in this article draws on a small set of well-documented sources rather than general fitness advice. Each one addresses a distinct piece of the treatment picture.
This article is general information, not a substitute for advice from a qualified doctor. Consult a qualified healthcare professional about your own circumstances before acting on anything here.
Recommended
Comments