
8–16 Week Rotator Cuff Rehab for Nassau & Queens: Clinic Guided Plan
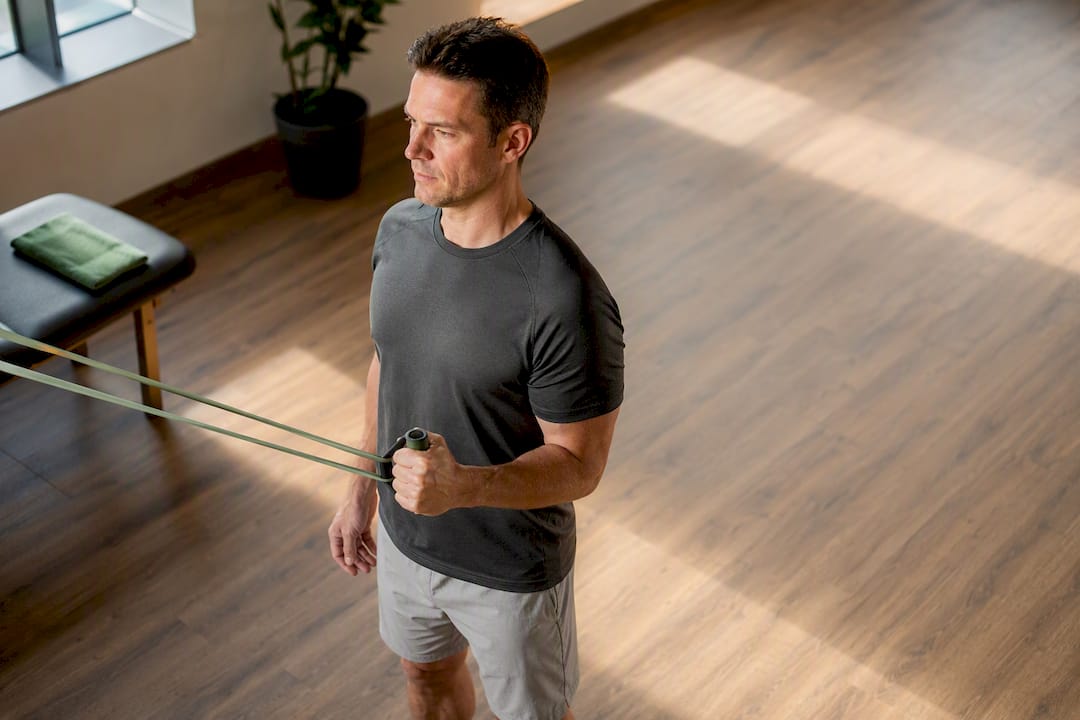
Most rotator cuff injuries respond well to a structured, progressive physical therapy program, and surgery is reserved for cases that fail to improve or show clear surgical indications on imaging. Early PT within the first three months tends to produce better outcomes, with most gains showing up over 8 to 16 weeks. What follows is the phase-by-phase roadmap, the exercises, the dosing, and the warning signs that tell you when to loop in a surgeon.
TL;DR:
Starting physical therapy early within three months leads to better outcomes, with most progress occurring between 8 and 16 weeks.
Rehabilitation progresses through three phases: protection and pain control, restoring motion, and strengthening, each with specific goals and timeframes.
Exercise progression from passive motion to resistance work depends on objectively measured improvements, not just elapsed time.
Surgery often offers no significant advantage over structured rehab for most partial or full-thickness tears, unless involving large tears, trauma, or rehab failure.
Consistency in home exercises and close monitoring of range of motion and pain levels are crucial for successful recovery.
Table of Contents
What Are the Phases of Rotator Cuff Rehab?
Rotator cuff rehab moves through three broad phases, and skipping ahead is one of the most common ways people slow their own recovery. Each phase has a job to do before you move to the next one. Think of it less like a calendar and more like a checklist your shoulder has to pass.
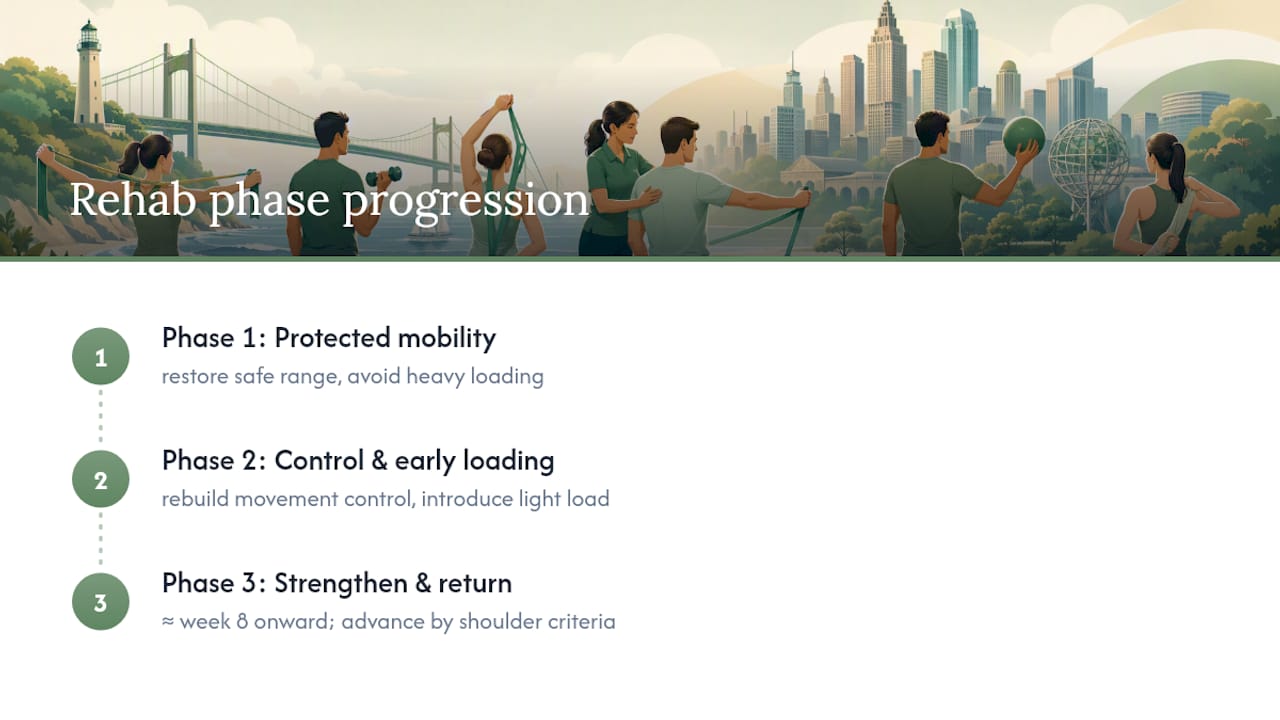
Phase 1: protection and pain control (roughly weeks 0 to 2)
The goal here is calming inflammation and protecting healthy tissue, not building strength. If you had surgery, this is your immobilization window; if you’re dealing with a tear or tendinopathy without surgery, this phase is shorter and more about activity modification.
Control swelling and pain with rest positioning, ice, and gentle activity within a pain-free range.
Maintain elbow, wrist, and hand mobility so the rest of the arm doesn’t stiffen up while the shoulder rests.
Begin pendulum exercises and passive range of motion only if cleared, letting gravity and a therapist (or your other arm) do the work instead of the injured muscles.
What to avoid: any active lifting, reaching overhead under load, or sleeping on the affected side, which tends to aggravate irritated tissue overnight.
Phase 2: restoring motion (roughly weeks 2 to 8)
Once acute pain settles, the priority shifts to getting your full range of motion back before you ask the muscles to work hard. This is where passive external rotation with a stick, table slides, and assisted overhead reaching come in. You’re teaching the joint capsule and surrounding tissue to move freely again.
Progress from passive motion (someone or something else moves your arm) to active-assisted motion (you help, using your other arm or a pulley).
Add scapular control work, since a shoulder blade that doesn’t sit still gives the rotator cuff nothing stable to pull against.
Track your motion weekly. A therapist typically measures forward flexion, abduction, and external/internal rotation with a goniometer to confirm you’re progressing, not just guessing by feel.
Clinicians generally want to see close to full passive motion before loading the cuff with resistance. Rushing this checkpoint is the single biggest reason people develop stiff, guarded shoulders months into rehab.
Phase 3: strengthening and return to function (roughly week 8 onward)
This is where isometrics give way to resistance bands, then light weights, then sport or work-specific movement. For many non-operative rotator cuff injuries, meaningful strength gains show up between weeks 8 and 12. For post-surgical cases, heavier strengthening typically doesn’t start until closer to week 12, based on tissue healing timelines discussed later in this guide.
Progression criteria matter more than the calendar. A therapist generally wants to see:
Full or near-full pain-free active range of motion.
Strength within a reasonable percentage of the uninvolved side on manual muscle testing.
No pain or compensatory movement (shrugging, arching the back) during functional reaching tasks.
Tolerance of progressively heavier loads without a flare-up lasting more than 24 hours.
Contemporaryrehabservices’ own phased recovery roadmap walks through these checkpoints in more clinical detail, including how therapists decide when someone is ready to advance.
Pro Tip: Keep a simple log of your pain-free range of motion in degrees, not just how the shoulder “feels.” Feelings are inconsistent day to day; a goniometer reading or even a photo against a doorframe grid gives you an objective number to compare week over week.
One caveat worth repeating throughout this whole process: age, tear size, tissue quality, and comorbidities all change how fast someone should move through these phases. A 68-year-old with a degenerative partial tear and well-controlled diabetes will progress on a different clock than a 32-year-old with an acute traumatic tear and no other health issues, even if both start rehab the same week.
What Exercises Help Strengthen the Rotator Cuff?
The exercises below follow the same logic as the phases above: motion before strength, control before load. Do them in roughly this order as you progress, not all at once.
Early mobility work
Pendulum swings. Lean forward slightly, letting the injured arm hang loose, and let it swing gently in small circles using momentum from your body, not your shoulder muscles. This teaches the joint to move without triggering a protective muscle guard. Do 1 to 2 minutes, 2 to 3 times a day, keeping the swings small and pain-free.
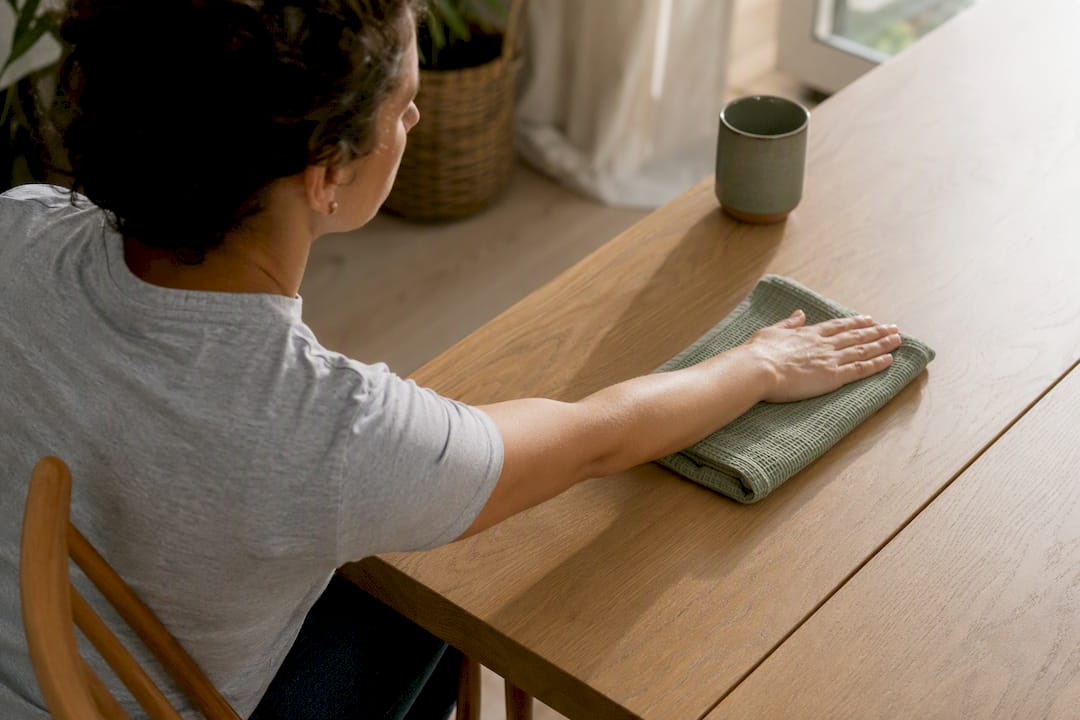
Table slides. Sit at a table, rest your forearm on a towel, and slide it forward and back or side to side. The table supports the weight of your arm, so you get motion without loading the cuff. Aim for 10 to 15 slides, 2 sets, once or twice daily.
Passive external rotation with a stick. Hold a cane or broomstick with both hands, elbow bent at 90 degrees and tucked at your side. Use your unaffected arm to push the stick sideways, rotating the injured arm outward. Stop at the first pinch or resistance, not at your absolute limit. Ten repetitions, held for 2 to 3 seconds at end range, once or twice a day.
Scapular stabilizers and posture work
A rotator cuff that fires well but sits on an unstable shoulder blade is like a rope pulling against a base that keeps sliding. Scapular control has to come before heavy cuff strengthening.
Prone rows or band rows: squeeze the shoulder blade toward the spine before bending the elbow, so the upper back initiates the movement, not the arm.
Serratus punches: lying on your back, punch a light weight or your fist toward the ceiling, protracting the shoulder blade at the top. This targets the muscle that keeps your shoulder blade flush against your rib cage.
Wall angels: back against a wall, arms in a goalpost position, slide them up and down while keeping contact with the wall. This exposes poor scapular timing quickly, since most people lose wall contact almost immediately.
Anyone whose shoulder pain traces back to poor posture or a tight thoracic spine may also benefit from reviewing how thoracic mobility affects shoulder mechanics, since a stiff upper back forces the shoulder to compensate.
Rotator cuff strengthening progression
Isometrics. Press your hand into a wall or doorframe in the external rotation, internal rotation, and abduction directions, holding each for 5 to 10 seconds without any joint movement. Do 10 reps per direction. This is usually the first true “strengthening” exercise cleared, since it loads the muscle without moving the joint.
Band external and internal rotation. Elbow at your side, bent 90 degrees, pull a resistance band outward (external rotation) or across your body (internal rotation). Start with 2 sets of 12 to 15 reps using light resistance, and only increase band tension once you complete all reps pain-free for two straight sessions.
Eccentric work. Once concentric strength is solid, add slow, controlled lowering phases, such as resisting a band as it pulls your arm back toward your body. A 3 to 4 second lowering count under light load builds tendon resilience that pure concentric work misses.
Modifying load safely: increase repetitions before you increase resistance, and increase resistance before you increase range of motion into more provocative positions like overhead. Slowing the tempo (a 3 second lift, 3 second lower) increases difficulty without adding a heavier band, which is useful when you’ve maxed out the color-coded resistance you have at home.
Common form faults worth watching for: shrugging the shoulder toward the ear during band work (a sign the deltoid and upper trap are taking over from the cuff), and arching the low back during overhead reaching, which usually means the shoulder doesn’t have the motion or strength yet to go that high.
Pro Tip: Use the “hurt versus harm” filter on every exercise. Mild, dull discomfort that fades within an hour and doesn’t worsen the next day is generally fine. Sharp pain, pain that lingers past 24 hours, or pain that gets worse each session is your body telling you to back off the load or range, and check in with your therapist before pushing through it.
For a broader set of at-home progressions organized by week, Contemporaryrehabservices has put together a home exercise guide that pairs well with in-clinic sessions.
How Often Should You Do Rotator Cuff Exercises?
Home exercises work best in short, frequent doses rather than one long session. Most phase 1 and 2 exercises (pendulums, table slides, passive stretching) are appropriate daily, sometimes 2 to 3 times a day, since they’re low-intensity and meant to maintain motion. Strengthening work in phase 3 usually shifts to an every-other-day schedule, giving the tendon 24 to 48 hours to adapt between loading sessions.
In-clinic visits typically run once or twice weekly early on, tapering to biweekly as you become more independent with your home program. Cohort data on rotator cuff tears found that patients who started PT within the first three months had significantly better SPADI (Shoulder Pain and Disability Index) scores at that three-month mark, and that measurable improvement tends to plateau around 16 physical therapy sessions.
By the numbers: Improvement from supervised PT for rotator cuff tears tends to level off after roughly 16 sessions, and starting therapy within the first three months predicts meaningfully better function scores at that checkpoint. That 16-session mark is a natural point to reassess with your therapist, not necessarily an endpoint for care.
A sample conservative rehab schedule might look like this:
Weeks 1 to 2: daily home mobility work, 1 to 2 clinic visits.
Weeks 3 to 6: daily mobility plus early strengthening every other day, weekly clinic visits.
Weeks 7 to 12: strengthening progression 3 to 4 times a week, biweekly clinic check-ins.
Month 3 and beyond: most patients are transitioning toward independent maintenance, with occasional visits to progress load or address plateaus.
Checklists that track range of motion, pain levels, and strength milestones week to week make it much easier to spot a plateau early, which is exactly what a good tracking system is built to catch.
Does Surgery Work Better Than Physical Therapy for a Torn Rotator Cuff?
For many partial and even some full-thickness tears, structured non-operative rehab performs close enough to surgery that surgery doesn’t add a meaningful advantage. A systematic review and meta-analysis comparing surgical and non-surgical treatment for partial rotator cuff tears found that the differences in outcome scores between groups often fall below the minimal clinically important difference, meaning the statistical edge some surgical cohorts show doesn’t always translate into a difference patients actually notice day to day.
That doesn’t mean surgery never helps. It means the evidence supports trying appropriate conservative rehab first for most tears, rather than defaulting to surgery. A separate systematic review on exercise therapy for full-thickness tears found consistent improvements in pain, range of motion, strength, and function across conservatively managed patients, earning a moderate-strength recommendation for exercise as first-line care.
A few clinical factors tend to shift the conversation toward surgery sooner:
Large or massive tears, especially those involving more than one tendon, which have less capacity to compensate through exercise alone.
Acute traumatic tears in younger, active patients, where a sudden injury (a fall, a dislocation) is different from gradual degenerative wear.
Failure of a genuinely structured rehab program, meaning several months of appropriately dosed, supervised exercise without meaningful gains in pain or function.
Significant weakness or loss of function that limits basic daily tasks despite consistent therapy.
Not every trial agrees on the size of the benefit from exercise, and that inconsistency is worth naming honestly rather than glossing over. A broader review of exercise rehabilitation for rotator cuff tears found mixed results across studies, with some randomized trials showing clear benefit and others showing smaller effects. The overall pattern still favors starting with individualized, progressive exercise for most patients, then escalating to surgical consultation if that structured effort stalls.
The practical takeaway: unless you have a large acute tear, significant functional loss, or you’ve already put in a genuine effort with supervised rehab and plateaued, starting with progressive physical therapy is the evidence-supported first move.
What Happens During Rehab After Rotator Cuff Surgery?
Post-surgical rehab runs on a stricter clock than non-operative rehab because the repair itself needs time to heal into bone before it can handle real load. Rushing this timeline is the most common cause of retears.
Protection phase (roughly weeks 0 to 2, sometimes longer depending on repair size): the arm stays in a sling, and motion is limited to passive range performed by a therapist or through pendulum-style exercises. No active lifting.
Passive to active-assisted motion (roughly weeks 2 to 6): the ASSET consensus statement from the American Society of Shoulder and Elbow Therapists recommends protected passive range of motion during this window, gradually shifting toward active-assisted movement as tissue tolerates it.
Active range of motion (roughly weeks 6 to 12): the sling typically comes off, and you begin moving the arm under your own power without added resistance, still avoiding heavy lifting or sudden movements.
Strengthening (generally beginning around week 12): ASSET consensus guidance points to around 12 to 16 weeks before introducing more demanding strengthening work, timed to when the repair has enough biological healing to tolerate it.
One nuance worth knowing: EMG research on shoulder muscle activity has shaped which exercises therapists choose at each stage. Low-activation exercises like passive motion and pendulums come first specifically because they generate minimal electrical activity in the repaired tendon, and clinicians only introduce resistance once they’re confident the exercise won’t overload the healing tissue.
Timing of that very first post-op PT visit matters somewhat, too. Cohort data looking at early initiation of therapy (within the first four weeks after surgery) suggests earlier starts can produce better gains per visit, though final functional outcomes tend to even out once the full rehab course is completed, whether that started a bit earlier or later. In other words: don’t panic if your first appointment gets pushed back a week or two, but do follow your surgeon’s timeline closely otherwise.
For anyone wondering whether skipping formal rehab after surgery is an option, the honest answer is no. The tissue heals, but the strength, motion, and neuromuscular control around it don’t return on their own, which is exactly why structured post-surgical rehab matters even when the surgery itself went well. Every phase advance should also be coordinated with your surgeon, not just your therapist, since imaging or exam findings at follow-up visits can shift the timeline in either direction.
When Should You Stop and Call a Doctor?
Some discomfort is a normal part of rebuilding a shoulder. Dull, achy soreness after a strengthening session that fades within a day is expected and not a reason to stop. What’s not normal is pain that sharpens during an exercise, pain that keeps escalating session over session, or pain that wakes you up at night regardless of position.
Watch for these red flags and get evaluated promptly if any show up:
New numbness, tingling, or weakness spreading down the arm or into the hand.
Severe night pain that doesn’t respond to over-the-counter medication or position changes.
Fever, chills, or a general feeling of illness alongside shoulder pain.
Increasing redness, warmth, or swelling around a surgical incision, which can signal infection.
A sudden pop or giving-way sensation followed by a sharp increase in weakness, which can indicate a retear.
Certain health conditions change how cautious you should be with pain and progression. Diabetes, for example, can slow tissue healing and blunt some warning signals, so blood sugar control alongside rehab matters more than usual. Smoking is associated with slower tendon healing and higher retear risk after repair, which is worth discussing with your surgeon before and after surgery. Older age and lower baseline activity levels don’t rule out a good outcome, but they usually mean a more conservative pace through each phase rather than an aggressive one.
Pro Tip: If you’re ever unsure whether a symptom is “normal soreness” or a red flag, treat it as a red flag until a clinician tells you otherwise. A same-day phone call to your therapist or surgeon costs you nothing; a missed retear or infection costs you months.
How Does CRS Wellness Structure Rotator Cuff Rehab?
At Contemporaryrehabservices, rotator cuff rehab starts with an individualized plan built around your specific tear, surgical history (if any), and daily demands, not a generic printout. A landscaper and a desk worker with the same MRI findings often get different rehab priorities, because the strength and range demands of their daily lives differ.
Sessions typically follow the phased structure outlined throughout this guide: motion restoration first, scapular control and isometrics next, then progressive loading once objective criteria, not just a date on the calendar, say you’re ready. Visit frequency usually starts weekly or twice weekly and spaces out as your home program takes on more of the load.
Contemporaryrehabservices accepts Medicare, Aetna, Cigna, Emblem, and United Healthcare, along with direct cash payment, and offers virtual visits for patients who need flexibility with scheduling or mobility between in-person appointments. That combination matters for shoulder rehab specifically, since consistency of care over 8 to 16 weeks tends to matter more than any single visit.
What Clinicians Wish Patients Knew About Shoulder Rehab
The biggest setback isn’t usually a bad exercise choice. It’s inconsistency. Someone does their home program diligently for two weeks, feels better, skips a week, then wonders why progress stalled. Rotator cuff tissue responds to steady, repeated loading, not bursts of effort followed by gaps.
Return to daily tasks, like reaching into a cabinet or carrying groceries without a wince, often happens well before return to heavy lifting or overhead sport. Those are different milestones with different timelines, and confusing them leads to frustration that isn’t warranted. A desk worker might feel “recovered” by week 8, while a competitive swimmer or overhead athlete may need closer to 6 to 8 months before full-intensity return, particularly after surgery.
The adherence tactics that actually work are unglamorous: short daily sessions instead of occasional long ones, a written log instead of memory, and brief weekly check-ins to catch plateaus early rather than months later. Progress in rotator cuff rehab is rarely dramatic day to day. It’s the accumulation that gets people back overhead.
— CRS Wellness
Getting Started With Rotator Cuff Rehab at CRS Wellness
Contemporaryrehabservices offers a direct path to supervised, phase-appropriate rehab instead of guesswork from a printed exercise sheet, with both in-person visits and virtual care available depending on what fits your week.
Your first visit includes a full movement assessment, strength testing against your uninvolved side, and a review of imaging or surgical notes if you have them, so your plan reflects your actual tear and tissue, not a generic protocol. From there, you’ll leave with a specific home program and a clear sense of what has to happen before you progress to the next phase, whether that’s more motion, more resistance, or a return-to-sport conversation. Manual therapy techniques, including joint mobilization and neuromuscular re-education, are built into sessions when they’re appropriate for your specific restrictions.
Contemporaryrehabservices accepts Medicare, Aetna, Cigna, Emblem, and United Healthcare, plus direct payment, and serves patients across Nassau County and Queens. If you’re near Nassau County, you can review services and book at the Albertson location page, or check the Great Neck Plaza page if that’s closer to home. Overhead athletes rebuilding toward throwing sports should also look into sport-specific arm strength progressions for throwing athletes once general rehab criteria are met.
Sources
This article is general information, not a substitute for advice from a qualified doctor. Consult a qualified healthcare professional about your own circumstances before acting on anything here.
Recommended
Comments